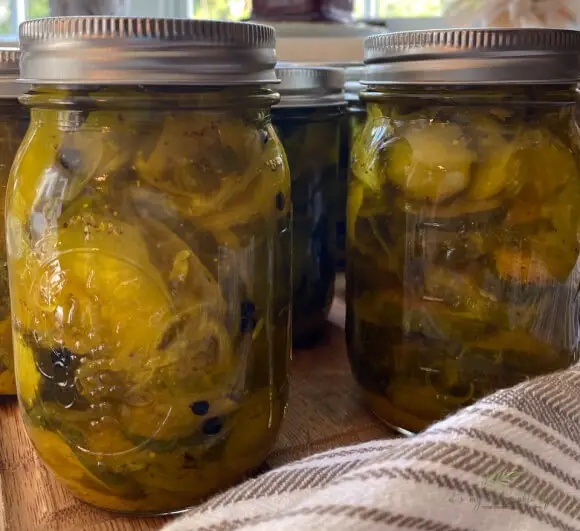
Bread and butter pickles may be our all time favorite recipe for pickles. This old fashioned pickle recipe offers the perfect balance of sweet and sour, and is the most delicious accompaniment to both sandwiches and burgers alike.
This post may contain affiliate links at no additional cost to you. By making your purchases through the links on this website, IMSL may make a small percentage at no direct cost to you. IMSL only promotes products we use & truly believe in. Please refer to my Privacy & Disclosures for further information. IMSL thanks you for your support!
You know it’s the height of the summer here on the hill when the scent of vinegar & pickling spices waft from the kitchen and every inch of counter space seems filled to overflowing with cucumbers.
Although not a bad problem to have, you can bet the farm that pickle making is on the agenda. Good thing we love our pickles! Dill pickles, fermented pickles, refrigerator pickles, and of course the ever loved bread & butter pickles.
BREAD & BUTTER PICKLES – TO CAN OR NOT TO CAN
Although you can make bread & butter refrigerator pickles, they are just that. Not shelf stable and meant to remain in the refrigerator. Although we do love refrigerator pickles (a flavorful way to use up leftover brine from canning pickles), we prefer to have stores in our pantry that are safe to eat throughout the year.
And that means canning them. If you are new to canning, don’t be intimidated. It is an easy process, just make sure you follow the steps and not omit or change the required ingredients or processing time.
If you haven’t grabbed our FREE “Beginners Guide To Canning” simply scroll to the right and sign up for our once per month newsletter “Happenings On The Hill”. This beginners guide will take you step-by-step through safe water bath canning procedures.
When it comes to canning this bread & butter pickle recipe you have 2 options for making them shelf-stable. Water bath canning or steam canning. If you are unfamiliar with either of these safe canning methods simply click the link for a complete tutorial.
Before you know it, your shelves will be lined with colorful, delicious foods to enjoy throughout the year! Including these historical, oddly named, but still delicious pickle variety. Which got us thinking, where exactly did the name come from?
BREAD & BUTTER PICKLE HISTORY
Growing up we made good use of eating what was in season. We made meals out of fresh corn and cucumbers. Literally. Just corn and cukes. After all, both were in season for such a short time, not to mention very economical to grow or buy.
One of my favorite ways, well other than eating whole with a little salt, was cucumber sandwiches. Not the fancy kind you would find at a proper English tea, but rather thickly slice fresh from the garden cucumbers layered on white bread and slathered with mayonaise. A treat still enjoyed today.
While cucumber sandwiches were a reliable staple during the height of the growing season, bread & butter pickles are not only a reliable, sure to satsify pickle, they are also steeped in history as well.
Depression era cucumber sandwiches were common in many kitchens. Largely due to the plethora of cukes available & the obvious low cost. Sandwiches were made using simple ingredients, bread, butter, and cukes or pickles. We can only imagine the name, “bread and butter pickles” being born from necessity.
In Amy Thielen’s book, “The New Midwestern Table 200 Heartland Recipes: A Cookbook”, she states the following in regard to depression era eating….
“Pickle sandwiches are born out of the farmhouse kitchen table. The ever-present stack of sliced homemade white bread, the butter, the fermented dill pickles…it doesn’t take a scientific mind to put them together into a sandwich.”
Amy Thielen
Bread and butter pickles were made a home staple in the early 1920’s when Omar and Cora Fanning commercialized these particular pickles, applying for a trademark in 1923. They were then promoted as “old fashioned” and the “latest greatest thing”.
Quickly becoming popular and remaining so to this day, bread and butter pickles are found on store shelves as well as pantry shelves, and are a common entry in many county fairs.
BREAD & BUTTER PICKLES FOR CANNING
Making these tangy pickles is easy, quick, and creates a shelf-safe long-term storage option by utilizing the canning method. This safe, delicious recipe is one we make using the Ball Blue Book Of Canning.
This recipe is tried and true and can be made using additional ingredient options if so desired.
BREAD & BUTTER PICKLE CANNING TIPS
To make these old fashioned bread & butter pickles, gather your cukes. The beauty of this recipe is any size cucumber will do. What do I mean by that? If you grow cucumbers then you know that they hide. No matter how hard you search each day for harvesting, there are always the elusive cucumber that’s missed.
What does that mean? It means you can often end up with gigantic, overgrown cucumbers that tend to be bitter. These huge cukes can either become chicken treats (which they often do) or used in this versatile pickling recipe.
Since this recipe calls for “sweating” the vegetables, aka salting them and letting them leach their fluid, the level of bitterness is greatly if not reduced completely. Therefore, any size will do 🙂
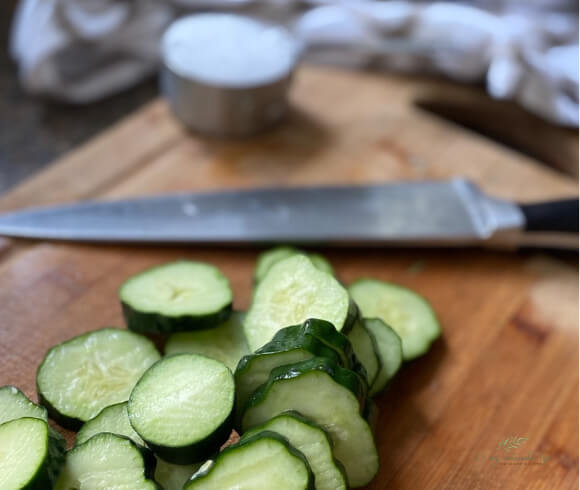
We do, however, recommend if purchasing your cucumbers to choose organic, thin skinned cucumbers. Many store-bought, waxed cucumbers are very thick skinned, making them not such as great choice for this recipe as the cucumbers are sliced skin intact.
Instead of grocery store-bought, visit your local grower or farmers market and stick with a more traditional pickling cucumber.
Utilize pickling or canning salt. Canning salt (pickling salt) is salt in its purest form. This salt does not contain any additives (iodine or anti-caking agents) which can cloud your end product, and vary the taste & texture of the pickle.
Choose a vinegar with at least 5% acidity. Most commercial brands will meet this standard.
- APPLE CIDER VINEGAR – This is our choice for making any pickle recipe. Although the color of the pickle may come out a bit deeper in hue, we feel the superior flavor and health benefits from choosing an organic ACV with a “mother” is worth it
- WHITE VINEGAR – This distilled vinegar made from corn and rye works as well. Always choose an organic brand to stay clear of GMO inputs
OLD FASHIONED BREAD & BUTTER PICKLE CANNING STEPS
As stated above, if you are new to canning, be sure to grab our free ebook or visit the tutorial. Should you need any further assistance, the “National Center For Home Preservation” website is a wealth of information as well.
If you want to steam can these visit the link for the tutorial.
STEP 1: GATHER ALL WATER BATH CANNING EQUIPMENT
To safely can bread & butter pickles you will need all the necessary equipment for water bath canning…
- WATER BATH CANNER – Available in both porcelain (enamel) or stainless steel options. BEGINNERS NOTE: The porcelain options, although more reasonable in price, will erode over time and need replacement. The stainless steel options are just the opposite; last & need no replacing
- LARGE STOCKPOT – Again, we recommend stainles when purchasing
- SMALL SAUCEPAN –
- MASON JARS – For this recipe, we recommend wide mouthed (easier to fill), pint sized jars
- LIDS & BANDS – Wide mouthed
- CANNING SALT
- JAR LIFTER –
- BUBBLE REMOVER –
- FUNNEL –
- MAGNETIC WAND –
- KITCHEN TOOLS – Towels, cutting board, knives, bowls, & ladle
When first outfitting your kitchen with canning tools & supplies, it is often more economical to purchase premade canning tool kits such as the one shown below.
STEP 2: PREPARE THE VEGETABLES
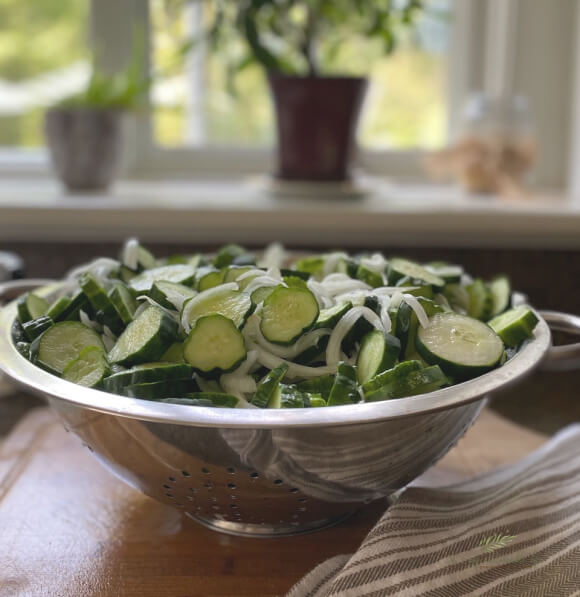
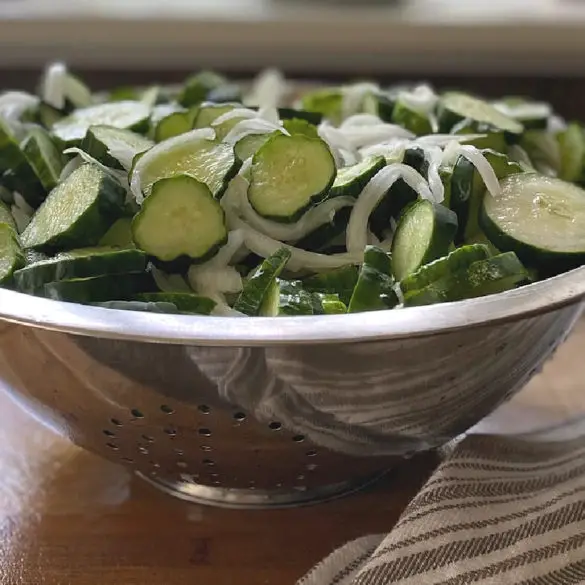
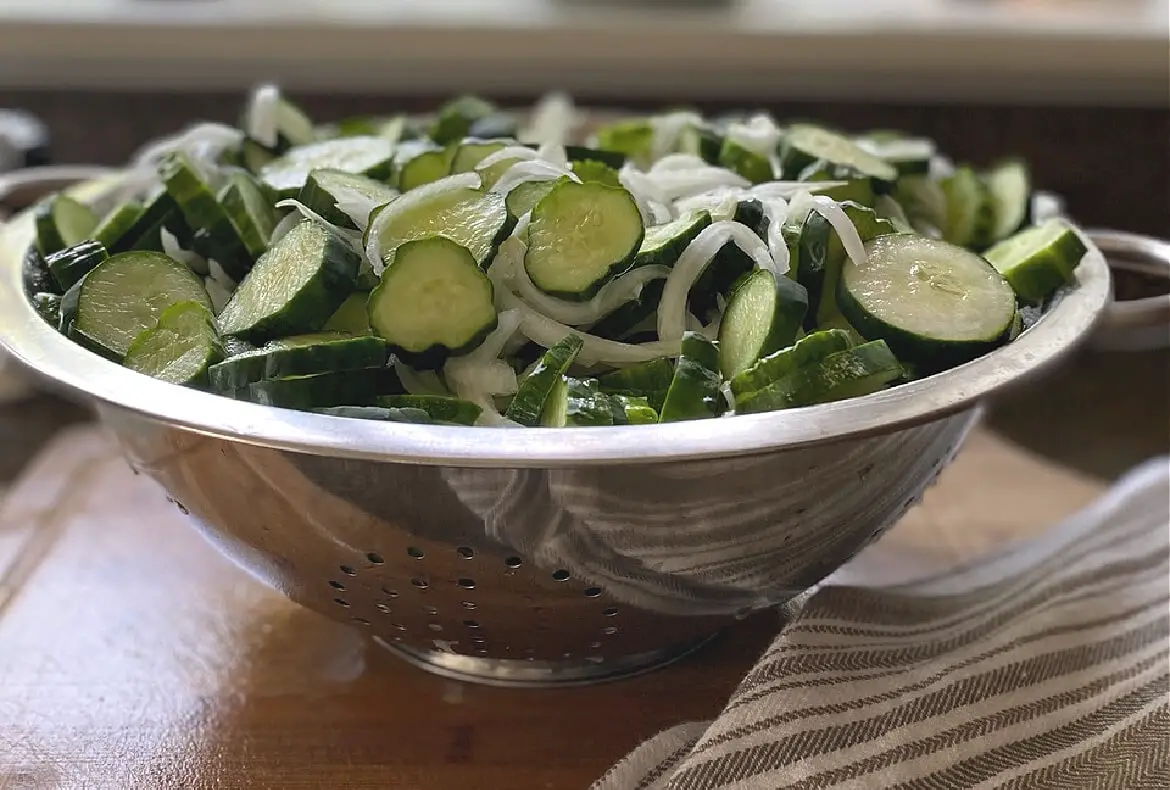
Slice the cucumbers into roughly 1/4 inch rounds or slices. Thinly slice the onions.
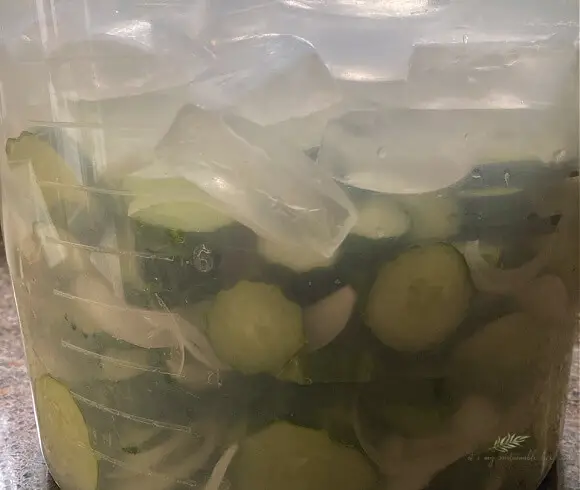
In a large container or bowl, add a layer of cucumbers & onions, sprinkle with canning salt and repeat until all vegetables and salt are used. Cover with ice cubes and allow to stand for 1 1/2 hours. This is what will leach unwanted moisture, bitterness and improve texture & taste of the end product.
STEP 3: PREPARE CANNING SUPPLIES
Wash your canning jars, lids, and rims.
In the water bath canner, using a rack at the bottom of the pan (so jars do not rest on bottom of pot directly), bring the jars to a boil & sterilize for 10 minutes. Reduce the heat to medium to keep water hot. Keep the jars in the hot water until ready to fill.
Place the lids in the small saucepan, cover with water. Bring the water to simmer, and reduce the heat to low to keep warm.
Place a towel next to the stove/filling area and place the washed & dried rims, funnel, ladle, bubble remover, jar lifter, and magnetic wand.
STEP 4: PREPARE THE BREAD & BUTTER PICKLING BRINE
In a separate stockpot, add sugar, vinegar, mustard seed, turmeric, celery seed, ginger, and peppercorns. Optional ingredient suggestions can be found below.
Bring the brining liquid to a boil.
Drain & rinse the cucumber/onion & salt and allow them to drain well. Once completely drained, add the vegetables to the stockpot of brining liquid. Bring the mixture to a boil, stirring every so often. Reduce the heat to med/low to keep warm.
STEP 5: CANNING THE PICKLES
When filling jars to be processed, work as efficiently & quickly as possible. Remove two hot jars from the water bath canner, place funnel on top of one of the jars next to the stockpot of pickles. Ladle pickles into the jar and top with brining liquid, leaving at a minimum 1/4 inch headspace (the space from the top of the product to the top of the jar). Using the bubble remover, carefully run the tool around the outer edge of the product to remove any bubbles that may have been created. Try not to get any liquid on the upper rim of the jar.
Carefully look at the jar rim. If there is any droplets or moisture, take a very clean kitchen towel and wipe the rim. Remove the funnel and place on the empty jar.
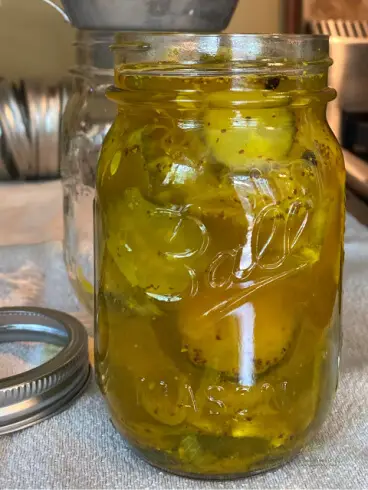
Using the magnetic wand, lift a lid from the warm water and place on top of the jar. Screw a band on top of the lid & adjust the two piece caps to just finger tight. Place into the water bath canner, remove another hot jar and repeat.
Once you have completed the filling process and all filled jars are in the water bath canner, bring to a boil and process for 10 minutes for pint jars, 15 minutes for quarts.
Using the jar lifter, remove the bread & butter pickles from the water bath canner, placing them on a cooling rack or towel to cool.
STEP 6: DOUBLE CHECK THE PROCESSED JARS
The beautiful sound of the jar lids “popping” is the sound of safety when it comes to canning.
Once the jars have completely cooled, double check the tops by gently running your finger across the lid. The lid should feel un-giving or firm to the touch indicating it has sealed completely. If the lid feels “spongy” they did not. All is not lost, however, simply place any unsealed jars in the refrigerator and use those first.
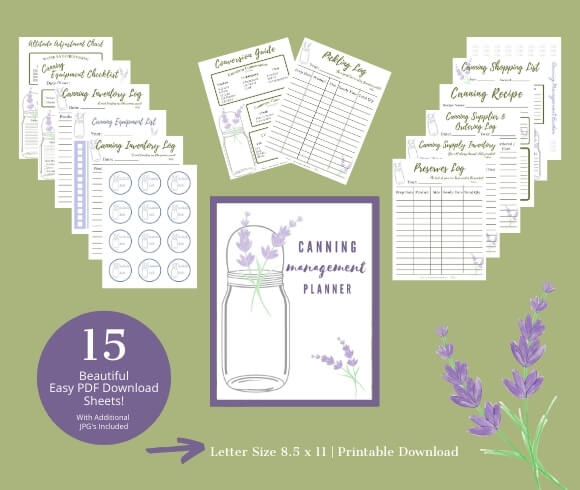
Write the date of processing on the top of the lid or use our beautifully crafted canning labels available now in our Canning Management Planner, remove the outer bands for re-use, and store in a cool, dark area. These bread & butter pickles will last for 18 months or more.
Although still tasty if used right away, letting these pickles rest for 2-4 weeks will allow the flavor to develop even further.
Ingredients
- 4 # Fresh 4-6 inch pickling cucumbers, cut into even slices 1/4 inch thick
- 2 # Onions (about 8 small), sliced thinly
- 1/3 C Canning salt
- 2 C Sugar
- 2 Tbl Mustard seed
- 2 tsp Turmeric
- 2 tsp Celery Seed
- 1 tsp Ginger
- 1 tsp Whole peppercorns
- 3 C Vinegar
Instructions
This recipe was taken from the Ball Blue Book of Canning. This recipe is enough to fill roughly 7-8 pints
PREPARE THE BREAD AND BUTTER PICKLE VEGETABLES
- Combine prepared cucumber slices and onion slices by layering in a large bowl, adding salt to each layer. Cover with ice cubes and let set for 1.5 hours
- Drain, rinse, and drain again
PREPARE THE CANNING EQUIPMENT
- Wash the jars, lids, and bands in warm soapy water, rinse, and dry
- Place your water bath canner with rack on the stove, add the jars, fill with water to 1-2 inches above the jar line
- Bring water bath canner to a boil, boil jars for 10 minutes to sterilize
- Reduce heat in water bath canner to med to keep hot
- In small sauce pan add the lids (top side up for easier removal), cover with water, bring to simmer
- Reduce heat in sauce pan to low to keep warm
- Beside the stove place a towel laid flat, rims, jar lifter, bubble remover, funnel, and magnetic wand
PREPARE THE BREAD AND BUTTER PICKLE BRINE
- In a large stockpot add the remaining ingredients (from the sugar thru the vinegar)
- Bring to a boil
- Add the prepared vegetables to the brine
- Bring back to a boil, stirring occasionally
- Reduce heat to med to keep warm
CANNING PROCEDURE FOR BREAD AND BUTTER PICKLES
- Using the jar lifter, remove two of the hot jars from the water bath canner and place on the towel
- Place the funnel in one jar and fill with pickles, covering with brine, & leaving at least 1/4 to 1/2 inch headspace
- Using your bubble remover, gently move the tool around the outer edge of the pickles to help remove any trapped air bubbles
- Place the funnel on the next jar on your towel
- Using the magnetic wand, place one lid on top of a the filled, clean & dried rimmed jar (using a clean towel if needed)
- Screw on the rim, only finger tight
- Using the jar lifter, place the filled jar back into the water bath canner, & remove another hot jar
- Repeat the above process until all are filled and back in the water bath canner
- Bring water bath canner back to a boil & process (boil) the filled pint jars for 10 minutes (15 minutes if using quart jars)
- Remove the processed jars from the water bath canner using the jar lifter and place onto a thick towel, cooling rack, or cutting board to cool
- Check lids once the jars are cooled completely for seal by gently rubbing your finger across the top. DO NOT PRESS LID DOWN! This can create a "false" seal. The seal should feel firm with no give when you run your fingertip across. If there is any give, the jar did not seal well. Remove screw band if sealed
- Place any jars not sealed into the refrigerator and use first
- Label your jars with product name & date. Store in cool dark place
BREAD AND BUTTER PICKLE INGREDIENT OPTIONS
Don’t be afraid to change the recipe up a bit to suit your tastes! As long as you keep the core recipe as is, the vegetables, salt, sugar, and vinegar, change away! Some great additions would be…
- CRUSHED RED PEPPER FLAKES – For a spicy variety add either crushed red pepper flakes or even a fresh hot pepper to each jar
- CURRY – Create a unique, spicy pickle by substituting the turmeric with curry, add some garlic cloves and your good to go
- BRITISH BREAD & BUTTER PICKLES – Using ACV in lieu of white, brown sugar instead of white, creates a deep color and flavor
- GARLIC – Simply add garlic cloves to suit your taste in addition to the other listed ingredients
CANNING RESOURCES
USDA National Center For Home Food Preservation
The All New Blue Ball Book Of Canning
Storing Home Canned Foods NCFHFP
CANNING RECIPES & PROCEDURES
Now that you have the canning bug, you may be interested in these recipes and preparations!
We hope you can give these amazing old fashioned pickles a try! Join our conversation and let us know how they turned out!
This recipe was featured at Creative Crafts!
Love, Light, & Laughter ~


42 comments
Bread and Butter pickles are my favorite! I need to try canning.
Yes to the spicy option with the crushed red peppers! That’s right up my alley. Yum!
Bread & Butter pickles are one of our favorites too. Thanks for sharing this with us at the Homestead Blog Hop!
The recipe sounds delicious! Will have to give pickle making a try at some point!
I’ve always wanted to try canning, this seems like a great place to start! And my kids love pickles!
My son loves it when grandma sends us home with pickles that she’s made for us. Yum!
I love bread and butter pickles but I don’t have time or space to can. I do, however, love the idea of the cucumber and mayo sandwiches. I never heard of them.
Hopefully you can give them a try! Thanks for stopping by Alice!
Thank you so much for sharing! I look forward to giving it a try!
I was just thinking about doing this last night. it has been years since I have canned though.
This tutorial should help refresh your memory 🙂 Hope you can give them a try!
I absolutely love bread and butter pickles! We have a guy at our local farmer’s market that sells them. I buy a small container every week (along with his pickled pineapple, which is amazing).
Hello, this is one of my favorites for Encouraging Hearts and Home, this week! Stop by and say hello, and this post has been pinned!
What a nicely done post, Suzan! I am always so impressed by your garden expertise! I remember hearing those canning lids pop as a kid, but my mom never made pickles.Your recipe looks delightful! I’ll try it if I can find some pickling cucumbers. Better yet, I’ll grow them next year!
Thank you for the kind words, Ramae! Now that is a fun goal! Hope you enjoy!!
I love pickles! This looks like a great recipe.
This is definitely a favorite of mine that my mom taught me to make as a kid. So good!
I love bread and butter pickles and keep saying I want to try canning!
Hopefully you can give them a try!
This will go great on burgers and with my spicy chicken wings. Wahoo! Cannot wait for some pickles.
Great instructions! My husband would love these pickles!
I love bread and butter pickles!!! Have never tried canning but your step by step instructions makes me think that I might be able to do this without totally messing it up 🙂
Yes, you CAN 🙂
I just love your posts! This one is super cool! I never thought about canning and making my own pickles! Several friends do it. I love the tradition of it all and the knowledge that you know EXACTLY what is in what you are eating. You are an inspiration!
Awww, thank you Erica. It really isn’t hard, just takes time. Hopefully you can give these a try and see just how easy it really is!
Sounds very wonderful! Your recipe looks great!
Well, of course it never occurred to me why they are called bread and butter pickles, duh. They look so good! I loved this type of pickle growing up.
This looks like a great recipe! Yum, I love some homemade pickles!
I’ve never tried canning anything but now I’m tempted…!
Beautiful food that inspires, as always Suzan.
I am saving this recipe for future use. I have just started getting into canning and pickling and it is a little intimidating. Thank you for the thorough instructions.
How exciting, Sabrina! Be sure to grab your FREE copy of my beginners guide to canning by simply subscribing if you haven’t already. Happy Canning!
We love pickles and our garden usually produces a ton of cucumbers. I would love to try this.
Bread and butter pickles have long been my favorite!
I love canning bread and butter pickles! I have made them several times with zucchini and like using a larger one for a hamburger.. can’t wait to try your recipe! I pinned it for later!
My father always made bread and butter pickles in our home. Both of my parents were excellent cooks, but he had specialties including the pickles, chili, spaghetti sauce (secret sauce) and sausage making. My mom was the baker and casserole maker. – Margy
These are my family’s favorite pickles!
Oh my goodness – what a memory for me. I absolutely LOVE bread and butter pickles. My mom used to make them all the time (a depression era child) and as a child, I remember having bread and butter pickle sandwiches all the time – a favorite for me. I can taste the pickle juice right now. What a delightful read for me. Not a canner, wish I was…..want some right now….with some bread or not. Thanks so much. I am smiling.
Hi Beth~
Thank you so much for sharing that memory with me. I’m honored that this brought back so many happy moments for you! I wish I lived close, you would have a jar today.
Can’t wait to try this recipe! My Gran made bread & butter pickles but never wrote down her recipe. I’d love for you to share over at our Creative Crafts Linky Party
Have a great week!
Creatively, Beth
LOVE bread & butter pickles! I grew up with these and since learned they’re a bit of a mess to make! Your recipe looks so straight forward. Thank you for sharing!
Hopefully it has inspired you to make your own! Thanks so much for stopping by.