Fermented garlic scapes are a quick, healthy, and easy way to preserve this fleeting, delicious crop.
This post may contain affiliate links at no additional cost to you. By making your purchases through the links on this website, IMSL may make a small percentage at no direct cost to you. IMSL only promotes products we use & truly believe in. Please refer to my Privacy & Disclosures for further information. IMSL thanks you for your support!
Here on the hill we love garlic. All things garlic. And why not? It’s extremely healthy for you, makes for a delicious addition to so many meals, an amazing remedy and immune support especially when making our honey fermented garlic, and its so easy to grow, harvest, and store.
Garlic has to be one of my favorite crops to grow as its so easy! And did I mention FREE? Yup, free. After my initial investment of purchasing garlic bulbs for planting, I simply save the biggest and the best from each years crop, plant in the fall, and leave it. No further purchasing necessary unless I find a variety that I’m not presently growing! WIN! WIN!
Come spring, the lovely green shoots begin to show themselves through my thick layer of mulch. But I don’t have to wait until mid-summer’s harvesting of the garlic to enjoy a few additional freebies 😊. Garlic scapes.
GARLIC SCAPES DEFINED
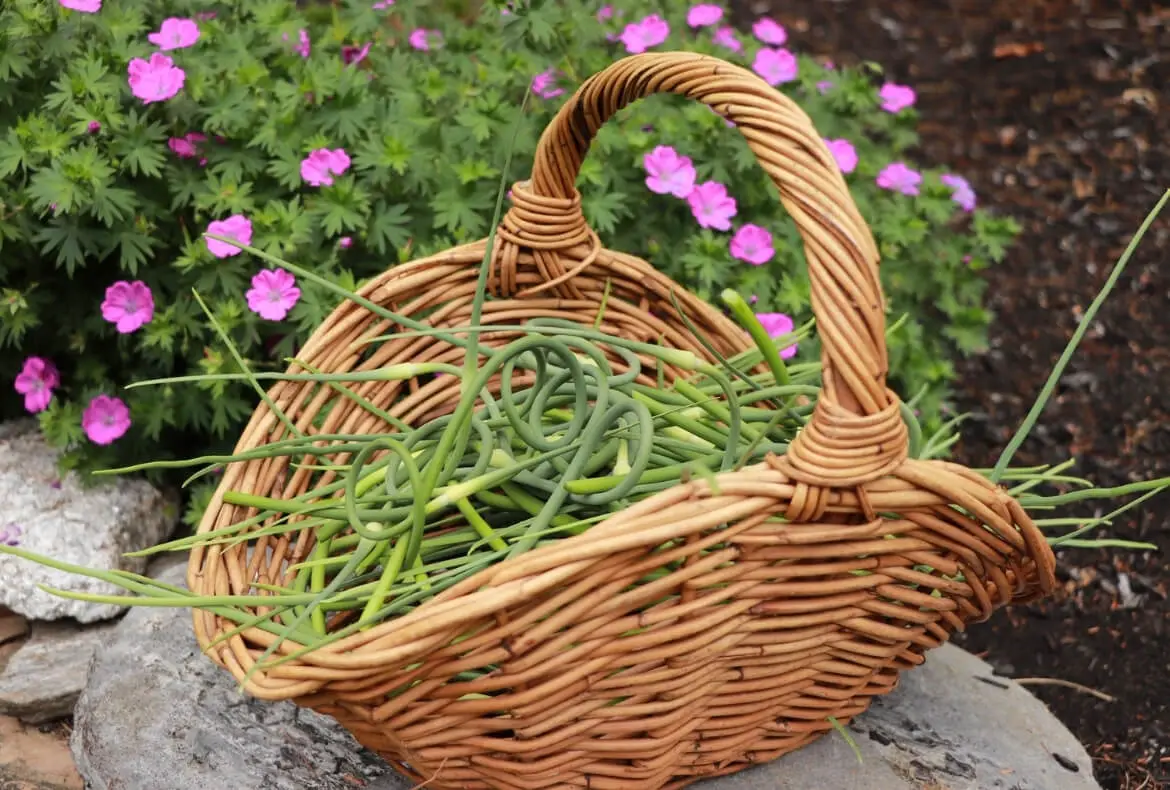
If you’ve never grown garlic you may be asking yourself, what the heck are garlic scapes anyway? Simply put, garlic scapes are the flowering “shoot” that presents itself right around mid-June here in my neck of the woods.
This “flower” or bulbil looks very similar to green onions as its growing. I’ve heard the bulbil referred to as an inverted “elf hat” from somewhere 😂. Cudo’s to whomever thought of that reference!
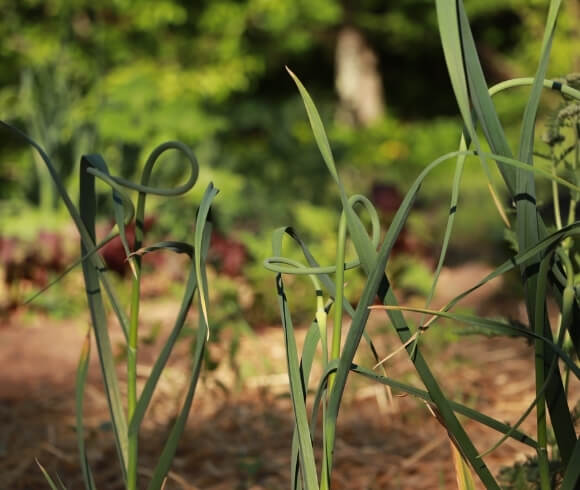
Should I be in need of additional seed for growing more garlic heads, I would simply leave the garlic scape to continue to grow and harvest the seed from this bulbil to plant.
However, I prefer to harvest the garlic scapes, use in various delicious ways, a few great recipe options can be found below 😊 , fermenting them being one of my favorite ways to preserve and use them.
HOW TO HARVEST GARLIC SCAPES
Harvesting garlic scapes is easy and quick. It should be noted that you will only find these delicious garlic scapes on hardneck varieties of garlic only. You can find a full, in-depth description and breakdown of all the differences between hardneck and softneck varieties HERE.
I’ve created a simple video for those visual learners out there which can be viewed below on simple it is to harvest your garlic scapes. What? You’ve not subscribed to my YouTube channel yet? Click the link & subscribe to stay up-to-date with all the “happenings on the hill” 😁
Many will wait to harvest the garlic scapes until they have created a circle or loop. I’ve harvested at all growth periods, from first beginning to sprout to the full circle and enjoy them all the same. I will say when they have reached full maturity and have formed their “loop” they become a bit more flavorful and pungent.
It is important, however, to harvest them prior to full blooming so its energy is redirected toward the growth of large, hearty garlic bulbs instead of the flowers.
To harvest snip the scape down low to where it begins to emerge from the garlic foliage or stock using a sharp pair of garden scissors or shears.
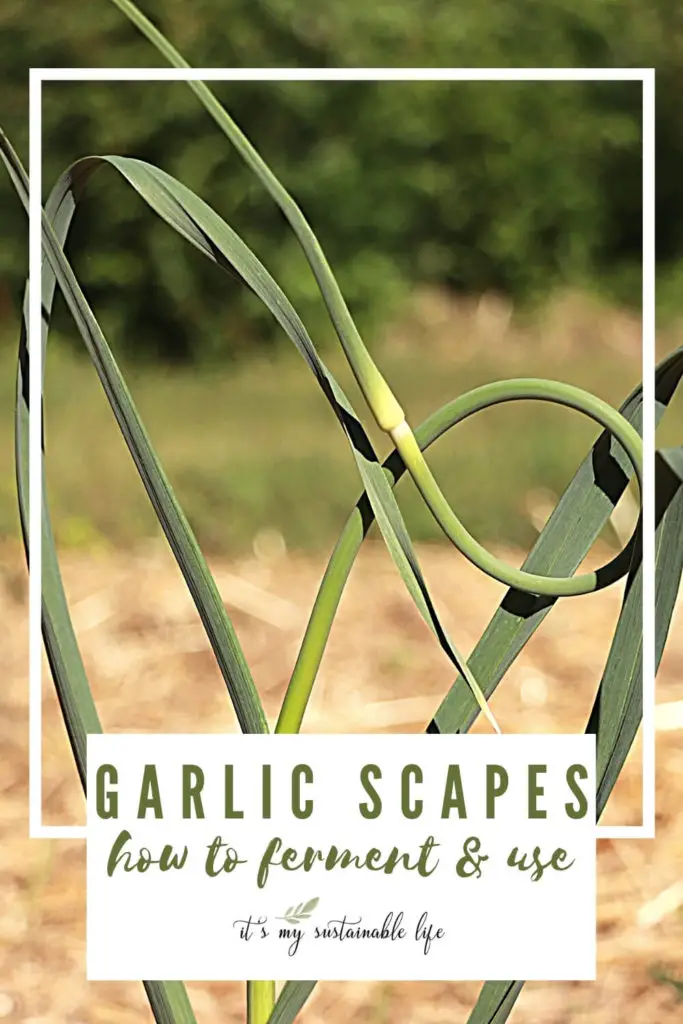
I typically will wait to harvest (as they don’t all arrive at the same time) until I have the amount needed to either create an amazing stir-fry, or a full jar of spicy refrigerator pickled garlic scapes (recipe coming soon!), or my favorite, fermented garlic scapes!!
Don’t grow your own garlic? For a short period, you can typically find garlic scapes at your local farmer’s market or farm stands. Note I said “short” period! Don’t miss this delicacy! Talk to your local grower for when theirs come into season.
WHAT ARE FERMENTED GARLIC SCAPES
So what exactly is fermented garlic scapes? Well, we now know what the garlic scape is, but why ferment them? Well, fermentation provides us a highly nutritive food product!
By fermenting our foods they are “kept “alive” by introducing a plethora of gut-healing enzymes, probiotics, and additional nutrients“. An added plus? They simply taste amazing 🤩

In addition to the increased nutritive benefits, they are also preserved through this process. Once fermented, foods become shelf stable for longer periods of time. It’s been noted that when properly fermented, food can last anywhere from 4-18 months.
I do find my fermented garlic scapes don’t typically last that long if you get my meaning!
LACTO-FERMENTATION VS FERMENTATION
I often get this question, is lacto-fermentation the same as fermentation?
There are actually 3 different forms of fermentation. All forms of fermentation refer to the “metabolic process that converts sugar to acids, gases, or alcohol“.
In a nutshell they are….
- WILD FERMENTATION – Occurs when naturally found microbes are found on either food or in the air & used to begin the fermentation process. Think sourdough starter here.
- LACTO-FERMENTATION – Lacto-fermentation (referring to lactic acid) is another form of wild fermentation. “Lacto” being short for Lactobacillus, a naturally occurring bacteria found on all things growing in the earth.
- CULTURED – When foods are cultured, typically some form of microbial starter is used to start the fermentation process. Think scoby here when making Kombucha.
HOW TO CLEAN & PREPARE GARLIC SCAPES
Once you have harvested your garlic scapes, the entire scape is edible. Some parts such as the very tip, the area from the blossom (bulbil) to the end, can become a bit fibrous and tough for my liking. I just snip that portion off.
They are now ready to be washed and prepared for use.
HOW TO CLEAN GARLIC SCAPES
To clean your garlic scapes, place them in a large colander and rinse with clean, cool water. If you have only a few to wash, I simply hold them and wash under a steady water stream.
Do not attempt to rinse or wash them by soaking. They can absorb too much water this way and have the possibility of becoming a mushy mess. I may or may not be speaking from experience here 😂
Once you have your garlic scapes washed be sure to take a clean kitchen towel and dry them well for just that reason. To keep them as crisp and fresh as possible.
Store the garlic scapes in the refrigerator in a reusable plastic bag for up to one week. I prefer to harvest, clean, and use all in the same day.
HOW TO PREPARE GARLIC SCAPES
To prepare or trim your garlic scapes is simply a matter of determining how you will be using them.
- WHOLE – If you are fermenting in a large vessel, you can simply use the entire garlic scape by looping or twisting the entire scape to fit into your vessel, add your brine and begin your fermenting process. Easy peasy!
- DICED – Enjoy your fermented foods in salads and your culinary creations? Dice the scapes into your desired lengths, add to your vessel, cover with brine and you are on your way.
- RELISH – This is one that I’ve not tried, but does look interesting. Dice the scape finely, add other vegetables diced finely of your choice (think cucumber, cabbage, or even celery) add a couple tablespoons of liquid from previous ferments as well as the brine and allow to ferment. Use this relish as you would any other.
It should be noted that unless you will be using your fermented garlic scapes up rather quickly, and we do here, plan on not adding the bulbil itself as they can tend to deteriorate at a faster pace than the “stock” of the scape.
That doesn’t mean you cannot ferment them tho! Make a small jar of the bulbil’s alone to ferment and plan on using those first!
HOW TO FERMENT GARLIC SCAPES
I always begin my process by creating the brine and then move on to preparing the fermentation jar as well as the garlic scapes. This allows the brine to cool to room temperature while I’m in the preparation stage.
FERMENTED GARLIC SCAPE BRINE
STEP 1
You have a couple options here. If you have access to clean, filtered water (no chlorinated or treated water is recommended), to prepare the brine you can simply use warm to hot water to completely dissolve the sea salt.
Otherwise, in a saucepan, bring your water to a boil (use whatever size your vessel is for the amount, for example if you are using a quart size jar, add 1 quart water), allowing it to boil uncovered for about 5 minutes. Turn the heat off and add the sea salt (3 Tbsp per quart), dissolving it completely. Allow it to cool to room temperature before using it in your ferment.
STEP 2
Begin preparing the scapes and your remaining ingredients.
Prepare the garlic scapes by trimming, washing, and drying. Cut to your preferred size.
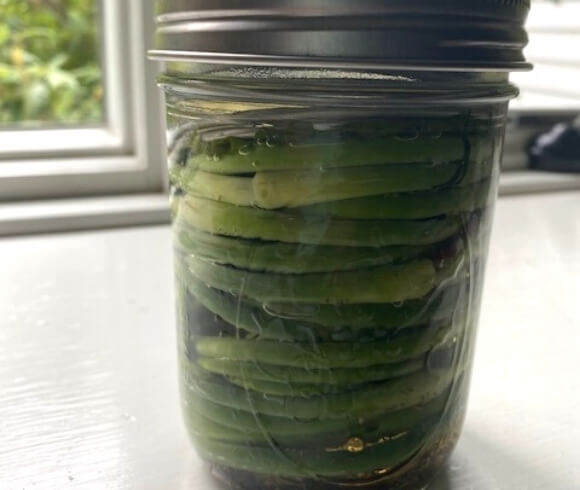
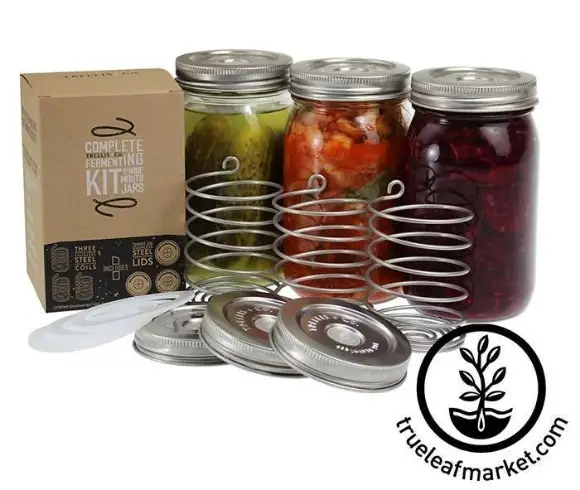
Place the prepared scapes into your fermentation vessel. I am blessed to have the Trellis Stainless Steel Fermentation Kit to make my ferments quick and easy & highly recommend this affordable kit. When using this kit you will need to use a wide mouth mason jar.
Add seasonings to your jar. In mine I’ve used the following seasonings for my quart jar and have adjusted when using a pint size jar: 3/4 tsp mustard seed, 1/2 tsp coriander seed, 3/4 tsp whole peppercorns, 2-3 bay leaves, a large sprig of fresh dill including the flowerhead if possible (optionally you can simply add 3/4 tsp of dill seed), hot peppers to taste (I’ve used 2 whole/slightly cut open as well as 1/4 tsp of red pepper flakes. We like spicy!).
Interestingly, I’ve just read that by adding 1-2 fresh leaves of either grape vines, oak, or horseradish can assist in keeping your vegetables crisp during the fermentation process due to their high level of tannins. I’ve never tried this, but am adding 2 of my grape vine leaves to give it a try!
Cover the scapes and the seasonings with your prepared and cooled brine until all are well submerged.
Place the grape vine leaves if you are using them on top of all. For the trellis fermentation system, place the helix weight coil in the jar on top of all, screw on the waterless silicone airlock.
If you are not using the Trellis system, make sure you utilize a weight of some kind to hold all your ingredients well below the brine, keeping absolutely everything submerged completely.
I place my filled jar in a dark cabinet on a plate just in case of any overflow to ferment. Keep an eye on your ferment daily. There should be no visible molds. You may notice a bubbling of the ferment. This is perfectly normal and actually a great sign the ferment is working!
After 5-8 days, give your ferment a taste (often ferments can be left to, well, ferment, for weeks). Once they are to your liking, remove, cover, and place in the refrigerator to store and enjoy!
NOTE: The temperature of the area you are fermenting will determine how fast it will begin to ferment. Warmer = faster, cooler = slower.
Your ferment will last for months while stored in the refrigerator and often even up to a year!
FERMENTED GARLIC SCAPE SERVING SUGGESTIONS
How to serve your fermented garlic scapes? In my opinion, any way you want! We enjoy them straight out of the jar 😊
A few suggestions to enjoy them is to use them as you would any condiment. Savor alongside sandwiches as you would a pickle, chop and add to stir-fries, salads, salad dressings, and even my famous potato salad!
Create a savory spread by creating a hummus or puree to enjoy as a base in sandwiches or bagels! There really is no limit as to how creative you can be when it comes to your fermented garlic scapes.
I hope you give this a try and enjoy your fermented garlic scapes as much as we do! Our only regret is how brief a time we have access to the garlic scapes!
How do you make your fermented garlic scapes?
Love, Light, & Laughter ~



23 comments
Does it snow where you live? If it does, does that mean when you plant in the fall, the garlic ‘hibernates’ till spring and then begin to grow? I’m definitely going to try garlic scapes
Yes, garlic appreciates the “hibernation”. You can find all the information you need to grow your own garlic 👉https://www.itsmysustainablelife.com/amazing-garlic-how-to-plant-for-next-years-crop/ and how to harvest, dry, and store 👉https://www.itsmysustainablelife.com/amazing-garlic-harvesting-drying-storing/.
Hope you can give it a try! Once you grow your own, you will never want store bought again! Thanks so much for stopping by!!
I’ve never heard of garlic scapes before. I love all things garlic, so this was interesting!
Great info! I definitely need to do a garden one year!
Wow! I’ve never seen or heard of garlic-scapes before. This is really so cool!
Another reason to try growing garlic! Garlic scapes.
I love garlic scapes and this looks like such a great recipe! I’ll have to try it out!
Wow, very informative!
These are beautiful! I have never heard of them! Now I am excited to try and grow them myself!
I will have to try this (if I can find some). I like the hummus idea!
Interesting… I don’t think I have heard of or eaten garlic scapes before! Will have to take a peak when I visit the farm market next!
I’m so very fascinated by your beautiful blog! I had NEVER heard of garlic skapes, although I think I may have seen them without even knowing it! Thank you for sharing your wealth of knowledge!
Thank you so much, Erin, for your kind words! I’m so pleased you are finding my site useful!
This is a new one to me. My husband loves his fermentation lids. I’ll have to suggest garlic scapes to him.
How interesting! I’m going to have to pick some of these up. Sounds like this is the perfect time of the year to grab some!
This is a great step-by-step tutorial on garlic scapes. I can’t wait to try this. Heading to the farmers market to see if there are any still available. I love the nutritional value of gut-healing enzymes. Thanks for sharing.
I bet this is so yummy in hummus! Thanks for the instructions!
This has so much great information that I never knew about garlic before! I definitely want to try growing some now and try to ferment some garlic scapes for myself!
I’m definitely going to have to do this. I grew up just outside the self proclaimed Garlic Capitol of the World and have never heard of fermented garlic scapes, although I’ve had garlic ice cream and garlic wine.
Oh, wow. Now those I’ve never heard of 😂
I love garlic scapes! Although I am doing the condo living thing without a garden right now, my CSA includes them in my weekly share. They are so great in stir fries and salads. I can’t wait to try this recipe.
You have a lot of great tips. I love garlic and put it on everything. Fermenting it is so much better for us because we get a lot more nutrients out of it.
So excited: as per your recommendation, I just picked up some garlic scapes at my farm market. Googling stir fry recipes now!