Growing peppers from seed is made easy with these top tips, opening up a wide world of pepper options.
This post may contain affiliate links at no additional cost to you. By making your purchases through the links on this website, IMSL may make a small percentage at no direct cost to you. IMSL only promotes products we use & truly believe in. Please refer to my Privacy & Disclosures for further information. IMSL thanks you for your support!
Many believe that in order to grow your own peppers from seed successfully is difficult endeavor. Not the case.
Fussy? Sometimes. Difficult? No.
Growing peppers from seed has never been easier when you follow these simple guidelines. It just takes a bit of patience & a bit of love ❤️
WHY GROW PEPPERS FROM SEED
You may be asking yourself at this point, “why bother growing my peppers from seed if it’s so difficult?”.
One word. Options.
TYPES OF PEPPER SEEDS TO GROW
When you grow your own peppers from seed it opens up the wide, wide, world of pepper varieties.
After all, when was the last time you saw a purple bell pepper at your local supermarket? When growing from seed your options expand from the beloved green bell to the sweet banana pepper to the extreme heat offered by the ghost pepper.
Peppers, aka capsicum, may be my favorite food to grow due to the varieties you can choose. Especially when it comes to hot peppers. It always brings such joy to research all the new varieties offered each year in my favorite seed catalogs.
Who can resist trying out exotic varieties like Ho Chi Minh, a new one I’m giving a go this year!
WHEN TO START YOUR PEPPER SEEDS
If there is one thing you need to know about peppers, it’s that they need time. Time to mature to the fruit bearing stage.
They need a long growing season. It can take up to 150 days for a pepper plant to mature and bear fruit. Especially some of the exotic hot pepper varieties.
It’s important to note that the number of days for a pepper to reach maturity, stated on your seed packet, specifically refers to the number of days AFTER the seedling produces its first “true leaves” until it produces fruit.
For many, this means starting your pepper plants indoors often in January or even February!
Creating and scheduling a seed starting schedule helps me to keep on schedule and not miss any of those important sowing dates!
Pepper plants can also be a bit on the slower side when it comes to germinating. The rate of germination is determined largely by the temperature of your soil, and can vary with different varieties.
Peppers like heat and warmer temps. Typically on average, peppers love soil that is about 80 F to 85 F and take an average time of 7 to 8 days to germinate. However, there are varieties that can tolerate and do well with cooler temps (50F to 75F) such as Thai, Anaheim, Poblano, and some ornamentals.
Thus, heat mats. At least for the gardening area that I live it, zone 5.
So unless you live in a warm climate, plan on starting your pepper seeds indoors instead of direct sowing into the garden, at least 8 to 10 weeks prior to when you can transplant them into the garden itself, aka your last frost date.
For those in warmer climates who enjoy a long growing season such as those residing in the South can certainly entertain the idea of direct sowing into the garden.
PEPPER SEED PREP
Unlike other seeds, when sowing pepper seeds there is really no special preparation that needs to be done prior to planting them.
That means, no soaking, cold stratification, or nicking them. YAY!
When it comes to planting your hot peppers, many recommend taking caution as the capsicum oils from the seeds themselves can irritate. Personally? I have not had any issue with this happening.
TIP: Should you react with a burning sensation from handling hot peppers, simply rinse your hands with a bit of plain yogurt or milk. And DON’T touch your eyes for obvious reasons 😊
EQUIPMENT FOR GROWING PEPPERS FROM SEED
Fortunately, there is not a lot of equipment or supplies needed to grow your own peppers from seed.
Here on the hill, we like to reuse and repurpose. A lot. For some great potting ideas be sure to check out my article “Alternatives For DIY Seed Planting Pots” that are cheap and can be used yearly.
No matter if you reuse or purchase, you will need seed starting trays or some form of container. Your choice.
Before beginning, gather the following equipment and supplies.
- SEED STARTING SOIL – I recommend an organic seed starting mix. Some good options can be found below
- HEAT MAT – As stated, unless you are blessed to live in a warm climate, peppers will need supplemental heat
- LIGHT SOURCE – Grow lights are the best option in my opinion. I utilize grow lights just about until the time I begin to harden them off, preparing for transplanting directly into the garden
- WATER – Kind of obvious as plants do need water, but having it near creates ease
- LABELING TAGS & MARKER – Trust me, you won’t remember what you planted. Getting in the habit to label and journal your garden is something I highly recommend from the get go
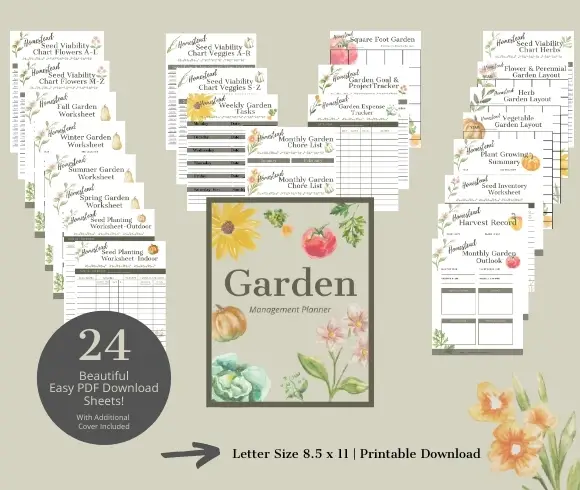
- GARDEN MANAGEMENT PLANNER – My favorite? Well, the one I created of course 😃 and can be downloaded from my Esty shop
PEPPER SEED VIABILITY
Pepper seeds are pretty hardy when stored properly and can remain viable for up to 25 years!
A good rule of thumb when it comes to your pepper seeds, however, is anywhere between 2-5 years. Like most seeds, they do best when kept in a cool, dark, and dry location.
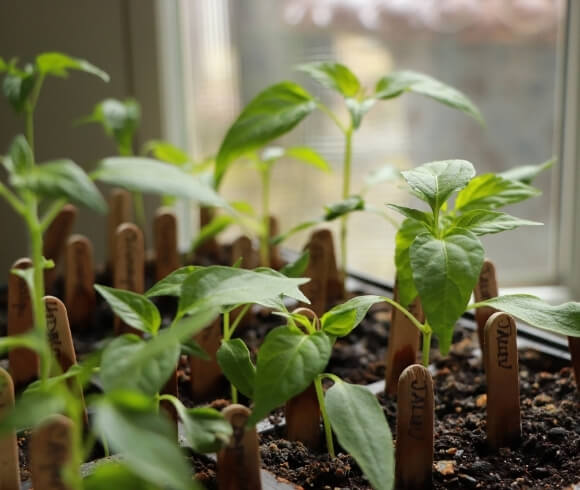
Should you have questionable seeds, perform a viability test to ensure you will not be disappointed with your germination results.
HOW TO GROW PEPPERS FROM SEED
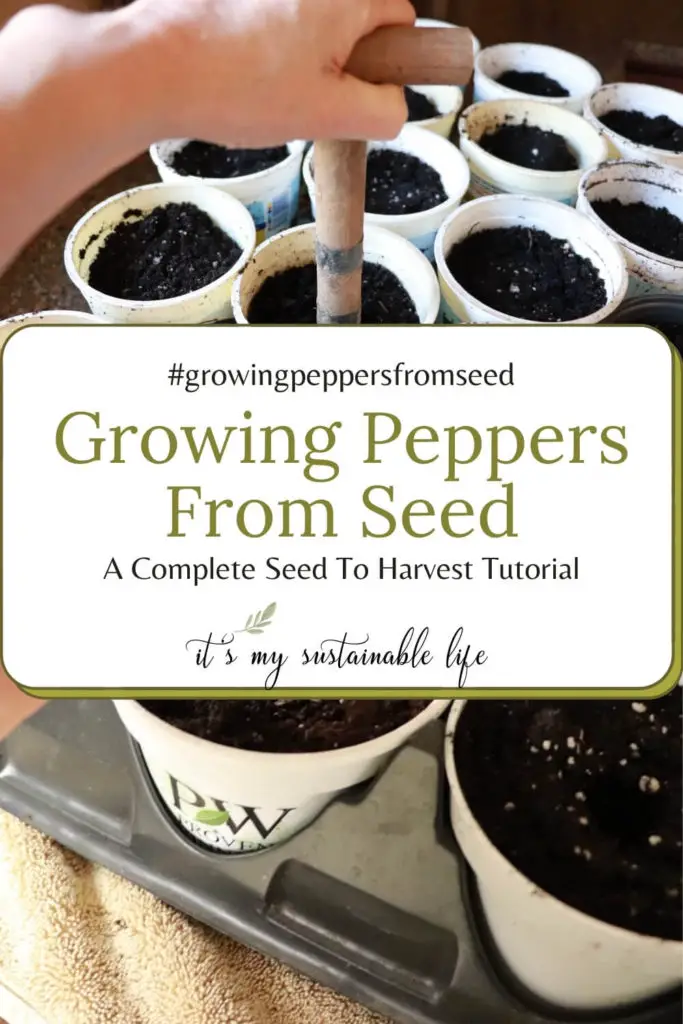
To start your pepper plants from seed, following these simple steps will have you sprouting green in no time. Or, well, maybe a little bit of time 😂
STEP 1 – Fill your seed starting cells, pot, or container of choice with seed starter soil mixture that has been dampened
STEP 2 – Have your seed packets at the ready. Hopefully you will already have determined the number of plants and varieties you will be growing with your seed starter calendar 😊
STEP 3 – Plant your pepper seeds into each cell, 1/4 inch deep, and cover lightly with soil starter. I like to use the eraser end of a pencil to make a small, 1/4 inch deep indentation in each cell to drop the seeds into, and then cover with soil, tamping down lightly to create seed to soil connection.
NOTE: If you are using older seed with lower viability, you may wish to plant 2-3 seeds per cell to ensure good germination.
STEP 4 – Write your label (I use wooden popsicle sticks cut in half) and place into each cell
STEP 5 – Place the final planted tray onto your heat mat and lower your grow lights as low as possible over the tray. Alternatively, you can cover with plastic wrap or greenhouse cover first if you like.
If you are not using heat mats or grow lights, the tray should be placed in the sunniest location you have with access to with warm temperatures.
PEPPER CULTIVATION TIPS
Remember that love we spoke of? When it comes to cultivating and caring for your pepper plants there are a few points to consider.
WATERING PEPPER PLANTS
Peppers tend to be thirsty. Plan on supplying a consistent, moderate amount of water weekly, approximately 1 to 2 inch per square foot worth. This will need to be adjusted according to your climate or during excessively hot spells.
I like to let my peppers dry out a bit in between waterings. For my area, this means watering only every 2-3 days during the early spring, cooler days, and fall. I adjust this to almost everyday during the height of the summer months.
Major signs of overwatering peppers plants are discolored leaves (turning yellow) and rotting roots. Unfortunately, yellow leaves can also indicate under-watering. So there you go 😂
PEPPER SOIL REQUIREMENTS
When it comes to soil requirements for pepper plants, there are a couple recommendations worth noting.
Peppers enjoy well-drained soil that holds moisture as well. A “just right” balance needs to be made when it comes to soil. Creating a soil combination of both rich, loamy, and sandy soil works best.
Peppers prefer a soil pH between 6.0 and 6.8 to 7.0.
I like to add a bit of organic matter to my soil to improve moisture retention and always mulch (using seaweed grass and seaweed) to help retain moisture levels, especially during the summer heat.
PEPPER LIGHTING REQUIREMENTS
Proper lighting for peppers is important, especially when starting your peppers from seed indoors.
Not enough light exposure, the plants will become spindly and leggy. To ensure sturdy stems, provide grow lighting in addition to natural light for 14 to 16 hours daily.
I also encourage you to pet your plants by running your hands gently over the tops, mimicking breeze supplied in nature. View the video below to see how I pet my plants 🪴
FERTILIZING PEPPER PLANTS
Peppers tend to be light feeders, meaning they don’t want to be loved to death with over-fertilization.
They will, however, benefit from a regular dose of compost tea or organic feed such as liquid kelp. A 5-10-10 fertilizer is sufficient when growing peppers.
It should be noted that pepper plants do NOT enjoy high nitrogen fertilizers, especially if your goal is to harvest peppers and not just lush foliage 😊
Once your pepper plants have developed 4-5 sets of true leaves, you may want to consider applying magnesium sulfate (Epsom salt) directly to the leaves and stems to assist in keeping the foliage strong, preventing yellowing of the leaves.
Your Epsom salt should be scent free. Dissolve 1 teaspoon of Epsom salt to one gallon of water, place in a spray bottle and spray leaves & stems thoroughly every other week.
Optionally, once the plants have been transplanted into the garden itself, take one tablespoon of undiluted Epsom Salts and spread evenly around the base of the plant, mixing lightly in with the soil. Rain will do the rest for you 😊
PROPER AIR CIRCULATION FOR PEPPER PLANTS
In addition to petting your plants, it’s often wise to create further air circulation (especially those living in higher humidity areas) to offer additional air circulation via an oscillating fan.
Why? Several reasons. It will not only help to strengthen the plants, but also reduce the likelihood of any molds developing in the pots or soil.
TRANSPLANTING PEPPER SEEDLINGS
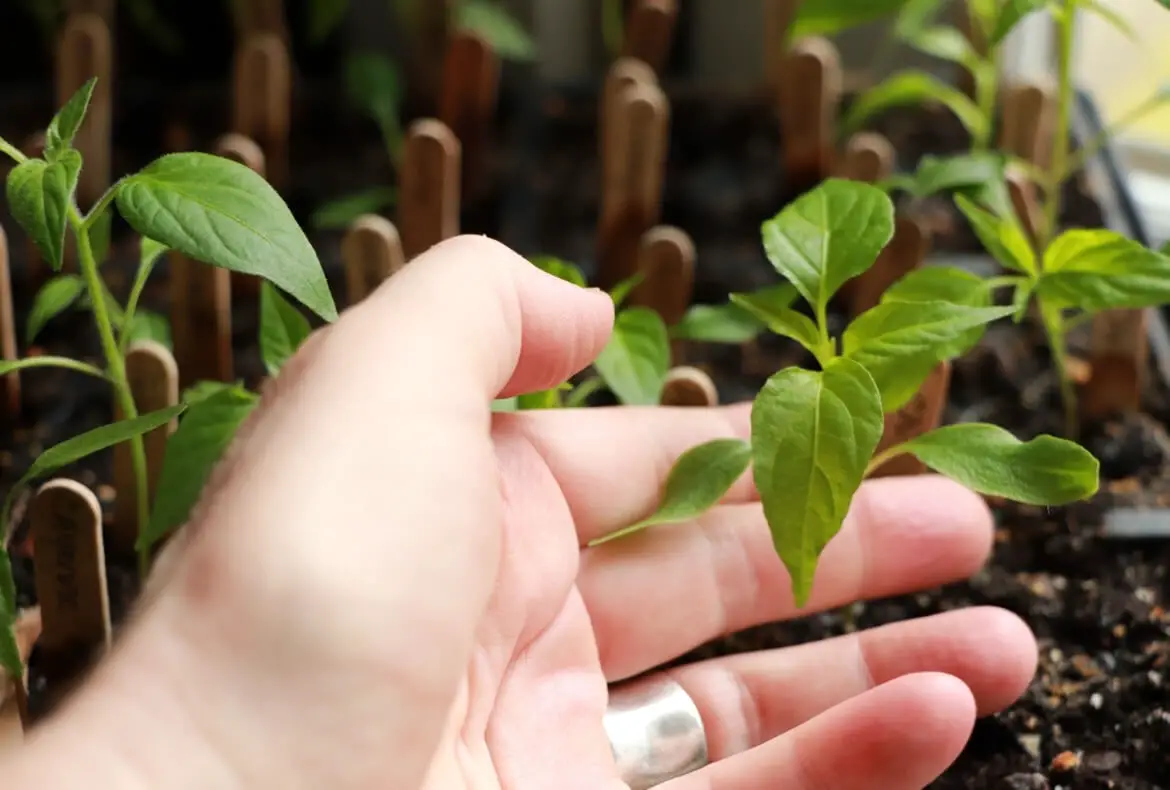
Once you’ve had germination in your seedling grow tray and your pepper plants have grown their first “true” leaves, it’s time to transplant them into a larger grow pot.
What are “true” leaves? True leaves emerge after the first two leaves, aka “seed leaves” or cotyledons, which are pointy in shape. Take a look at the video below for a visual on how easy it is to transplant your pepper plants as well as identifying the “true leaves”.
Transplanting is simple to do and allows the pepper plant plenty of space to grow until it reaches its final home in the garden space.
STEP 1 – No matter the pots you choose, choose larger grow pots that have several drainage holes in the bottom
STEP 2 – Fill your pot with a grow potting soil mix that has been dampened
STEP 3 – Using a dibble or your fingers, create a hole in the center of your transplant pot for the seedling
STEP 4 – Gently remove the seedling from the germination cell, making sure that there are plenty of roots attached to each. This is especially important if you have several seedlings growing in one cell and need to separate
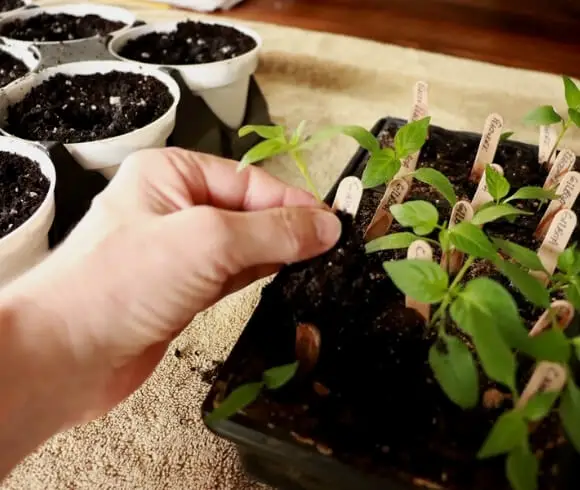
STEP 5 – Drop the seedling into the hole you created in your transplant pot
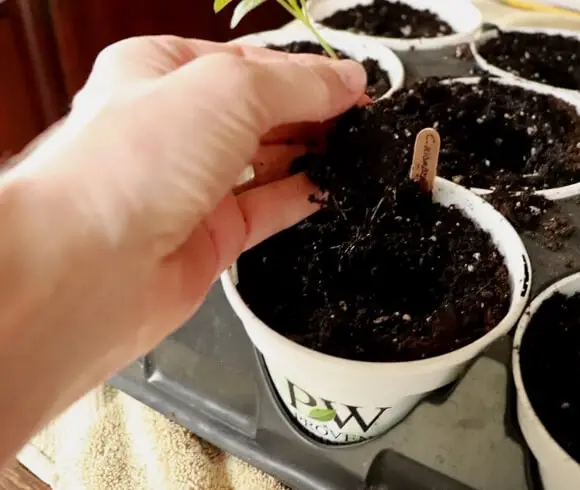
STEP 6 -Gently squeeze the soil around the base of the seedling to ensure a firm & stable connection with the soil
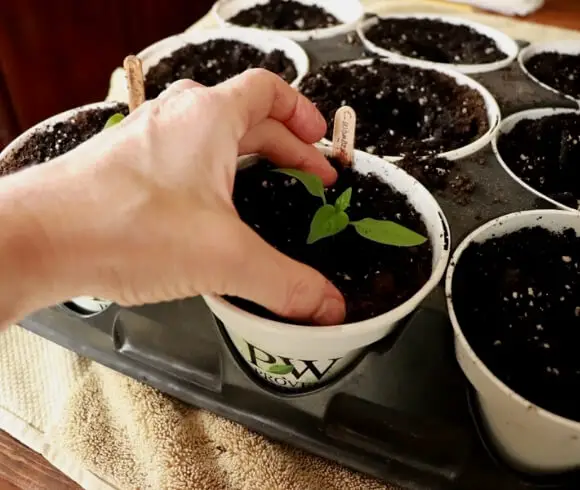
There you have it! Your peppers are now successfully transplanted.
HARDENING OFF PEPPER PLANTS
To date your pepper plants have been enjoying a very controlled environment. They have not had to learn how to deal with harsher elements; sun, wind, & temperature fluctuations.
The “hardening off” process takes care of that slowly, over a period of time. The entire process will take a couple weeks, so plan accordingly.
To start, set the tender plants outside in partial shade, beginning with about 1/2 hour of exposure. Make sure it’s not an excessively windy day on their first outing!
NOTE: Although the schedule is not written in stone, don’t stress your plants by keeping them exposed to their wilting stage! Also note that the outdoor elements will dry the soil faster than their indoor home, so you may have to offer additional water.
Increase their time exposed outdoors and in brighter sunlight each day, little-by-little until a full 8 hours of exposure has been reached. You can then consider leaving them exposed overnight should your weather be conducive.
During this time, some of your pepper plants may set their first blossoms. I like to pinch off the first few blossom pods to promote healthy growth in the overall pepper plant & not so much into creating, well, a pepper, when its time to transplant.
TRANSPLANTING PEPPER PLANTS
After your pepper seedlings have been hardened off, they are now ready to be transplanted into your gardening space. All threat of frost and colder night temperatures should be long gone by this time.
Temps should at least be maintaining nighttime temperatures 60F with the soil temperatures remaining that amount as well, although higher soil temps are preferred.
No matter your garden space, containers or beds, peppers need to find their permanent home to come to fruition.
There are a few considerations for transplanting your pepper plants into their permanent home.
PROPER PEPPER SPACING
Most all pepper plants are fairly compact and not huge space consumers.
Most varieties will require about 12 to 18 inches in between plants. Larger varieties may need a bit larger space, but I’m not overly concerned if they grow into one another somewhat.
COMPANION PLANTING PEPPERS
Pollination is key when growing peppers that produce fruit. Although self-pollination is a thing, our friendly pollinators are always a welcomed sight.
Doing all we can to invite my honey bees and attract beneficial insects into my pepper patch is always high on my list.
How? By planting lots of organic bee friendly plants & herbs near. My biggest piece of advice?
Don’t use pesticides! Pesticides are counter intuitive to attracting those beneficials.
Are there any plants that you want to keep your peppers away from? Yup. Nightshades. Think tomatoes, eggplant, and potatoes as this can expose your peppers to disease.
PROPER PEPPER PLANTING DEPTH
I plant all my seedling transplants, including peppers, to approximately the same depth as they were when removed from their pot. Going slightly deeper, only 1/4 inch to 1/2 inch, is okay as well.
PEPPER GROWING TIPS
With a few additional growing tips for your pepper plants your chances of growing successful pepper plants with increased harvests amounts is greatly much improved.
PEPPER PLANT SUN REQUIREMENTS
Peppers prefer full sun. Period.
That means at a minimum, 6 to 8 hours of direct, full sun exposure.
MULCHING PEPPER PLANTS
My pepper plants enjoy a thick mulch around the base of the plants. I prefer to use salt marsh hay for this as it feeds my plants, has no seeds, therefore, no weeds, and just smells amazing 🤩
Should you not have access to salt marsh hay, straw that has not been sprayed with inhibitors, or organic hay can be used as well. Personally, I prefer to keep it organic and natural, so no plastic sheeting here. But that is a personal choice.
Mulch not only acts as a weed preventer, but also retains moisture levels quite nicely, and also acts as a mini heater by retaining warmer temperature levels in the soil itself.
STAKING PEPPER PLANTS
Although we’ve increased the strength of our pepper plant stems with all our petting 😊 , peppers are an odd plant. They their growth habit tends toward the top heavy. Especially when its in its fruition stage.
Due to their awkward growth habit, they can be easily damaged with winds or just its own weight.
Staking carefully to not damage its stem is highly recommended once the plant reaches this stage. Repurposed nylons are recommended for this purpose as its a bit more gentle and can be expanded over a larger area of the stem itself without damaging it.
PEPPER PLANT PESTS
Although peppers are fairly hardy, at times they can be an attraction for some unwanted pests and disease.
Common pest issues like aphids, colorado potato beetles, flea beetles, and tomato hornworms can all enjoy feasting on your plants.

Disease issues like cucumber mosaic virus & anthracnose can occasionally appear.
In all my years growing peppers with proper crop rotation practices in place, I have never had any of these issues.
PEPPER HARVESTING
Many peppers are actually harvested early. Green peppers are a great example of this as when mature they turn to red, purple, orange, and yellow.
Although they can be harvested at any stage of their maturity, their flavor is at its highest when fully mature.
To harvest simply use a sharp gardening knife or scissors to cut the stem from the plant itself.
How long does it take to grow peppers from seed to harvest? Basically a long time 😂
Depending on the variety you are growing it can take 4 to 5 months to grow peppers from seed to harvest.
In my humble opinion, it is time well spent.
Will you be growing peppers from seed?
Love, Light, & Laughter ~



28 comments
Excellent step by step post on growing peppers! I usually plant 2 – 4 plants, so I just purchase them. If I had a bigger space though….
The seeds I bought are planted and sprouting in the green house! I love this stage!
Very informative! I’ve never tried planting peppers from seed..
Thanks for the great information. I tried this once a long time ago. I was not successful. Maybe I needed to read this first.
I love growing peppers and then pickling them.
Such a thorough post!
My son who is 14 loves to plant every color of pepper that he can find! We enjoy peppers, but my patience level usually prompts me to just buy seedlings or bigger plants. But our favorites are the sweet red peppers.
Appreciate you sharing this post, which featured this week at the Homestead Blog Hop!
Congratulations!
Laurie
Ridge Haven Homestead
Great tips! This will be so helpful when I start my garden! I definitely want some peppers!
Okay, I’m not going to lie, this looks hard! Haha. But that’s come from a non-gardener. I get intimidated by everything in the garden!
Thank you for sharing this with us on the Homestead Blog Hop. Your post has been selected as one of our features for hop #338!
I love growing peppers! I will have to try the petting trick this year!
Thank you for all of the tips! I’m excited for gardening this year.
Oh. I remember we grew little red peppers and they were so hot 🥵. We couldn’t even touch them. If you try to bite it. It makes you cough and your ears itch like crazy. No more growing peppers since then 😂😂😂 but I might try again. After reading your post I have a courage to do it 🤪
I’ve never grown these before but I love gardening!
So much helpful information! Thank you for sharing!
Dang! I’d love to have purple peppers! We use peppers all the time and they’d be in my veggie garden for sure. I’ve noticed our local farm has been planting more flowers at the ends of their rows lately and asked them about it and they said they’d been struggling with bringing the bees but this really helps, so love that you shared that in here too. I don’t use pesticides for that very reason! Bring on the bees!
You have such a talented green thumb. Always so impressed with your knowledge. I would love to one day be even half as good as you haha. My husband loves peppers but this is too advanced for me… for now! Thanks for sharing these tips.
This post is very in depth! Much appreciated for someone like me, who is a beginner when it comes to gardening from seedlings! So many gtreat tips!
I’m growing peppers from seed as we speak! Definitely learned some helpful info from this post.
Great post! We love using fresh peppers on our homemade pizza – there’s nothing like it!
Me too! Hopefully this post will inspire you to grow your own.
Great information! I love all the gardening info!
I have struggled with growing peppers, so I can’t wait to try your tips and advice this hopefully will help me with the one plant I have had problems growing especially from seed!
This post has some great information! I have planted peppers from the seed 3-4 times over the years. It’s so nice to realize I need one in a recipe and walk out back to get it! Thanks for all the helpful tips!
Great tips! I absolutely love peppers but they do take quite some time to grow. I have always heard about using epsom salts as fertilizer, but was skeptical. Your explanation lended some validity to the idea. Thank you!
Great tips! This is my first year growing sweet peppers from seeds and they did really well under grow lights so far.
It’s been so long since I’ve grown my own peppers. It was so awesome watching them take shape and then finally being able to move them to the garden.
I love your advice. I want to start a garden someday, but my husband says we travel too much.
What a helpful, informative post. Thank you! (Visiting from Grammy’s Grid link up)