Learning how to propagate lavender is an easy and fun way to expand your lavender plants at no additional cost. Follow these simple steps for propagating lavender from cuttings, and enjoy watching them grow!
This post may contain affiliate links at no additional cost to you. By making your purchases through the links on this website, IMSL may make a small percentage at no direct cost to you. IMSL only promotes products we use & truly believe in. Please refer to my Privacy & Disclosures for further information. IMSL thanks you for your support!
Lavender lover’s can rejoice. Learning how to propagate lavender, in essence cloning your existing plants, is easy to learn!
Here we’ll cover two methods of propagating lavender, when the best time to take your cuttings is, where to actually make the cut, and how to prepare and plant the lavender cuttings for the best success!
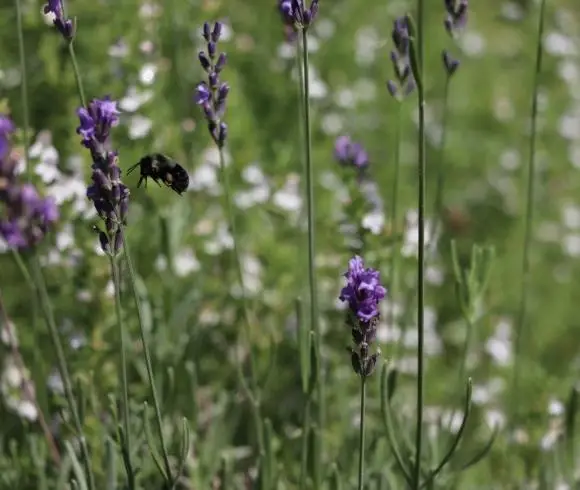
Following this simple guide to propagating lavender plants will have you & our pollinating friends enjoying an expanded lavender garden bed in no time 🐝🐝🐝
PLANT PROPAGATION DEFINED
Beginner gardeners may be scratching their heads & wondering what exactly is “propagation”? I know I did when I first began my gardening endeavors!
Sharing Is Caring ❤️
Plant propagation is in essence cloning a plant from a “mother” or existing plant. In the simplest of terms, creating new plants. Although there are many ways of plant propagation, for this article we are talking about cloning (asexual propagation), or making an exact genetic copy of a parent plant.
Lavender is by no means the only plant you can create new, cloned plants by propagating! Many herbs are easily cloned by using propagation methods, as well as some flowering plants (geraniums for example) and some trees (yews).
Requiring no special equipment, using your existing (or your friends 😊) lavender plants, propagating lavender is a fast and FREE way to expand your lavender garden beds.
Or share with a friend.
Or give as a gift.
Or grow a hedge.
Or just for the fun of it!
LAVENDER PROPAGATION IN WATER & SOIL
Although there are actually three methods for growing lavender, rooting in soil, rooting in water, and via seed, here we’ll be talking about propagating lavender from cuttings in either soil or water.
What are considered lavender cuttings?
Lavender cuttings are simply lavender stems which are cut from a mature lavender plant. These cuttings can then be rooted using either soil or water and then planted once roots begin to appear creating an entirely new lavender plant!
COMMON LAVENDER PROPAGATION QUESTIONS
A few common questions regarding lavender propagation answered for you.
HOW LONG DOES IT TAKE FOR LAVENDER CUTTINGS TO ROOT?
The time it takes for lavender cuttings to root largely depends on the type of lavender cutting you use, hardwood or softwood, as well as the method of propagation, water or soil.
Although both options of cuttings will work, I find that the hardwood cuttings are a bit more reliable.
To help you make your choice of cuttings, consider which type of cutting would work best for you …
SOFTWOOD CUTTINGS – Softwood cuttings are the soft and bendable tops of the new growth of a lavender sprig. Although softwood cuttings will root rapidly, they can be a bit less reliable in the long run, although opinions do differ on this. Softwood cuttings are typically taken during the spring in colder climates as they are readily and abundantly available. Softwood cuttings take less time to grow roots, anywhere from 2 to 4 weeks.
HARDWOOD CUTTINGS – Hardwood cuttings can be harvested at any time during the growing season, and for me, a more reliable method of propagation. Hardwood cuttings are just that. Sprigs that have been cut low on the branch into the tough, fibrous, hardwood area. This area is the previous season’s growth which has not become woody, thicker, and much less pliable. Hardwood cuttings are a bit more reliable to root and can take anywhere between 4 to 6 weeks.
HOW LONG TO PROPAGATE LAVENDER IN WATER
Propagating lavender in water can be tricky. Lavender is pretty susceptible to root rot. As it can take anywhere between 3 to 6 weeks or less to root a lavender sprig in water, the chances of developing rot in the stem is pretty high.
That being said, it can still be accomplished. The warmer and more humid your environment, the faster the stem will develop its roots.
HOW LONG TO PROPAGATE LAVENDER IN SOIL
A more reliable method for developing healthy roots in your lavender stems, propagating lavender in soil is our preferred method for creating new plants.
Taking a bit longer than propagating in water, typically anywhere between 4 to 6 weeks or so for it to begin to root when using the soil method of propagation.
SUPPLIES AND TOOLS NEEDED FOR LAVENDER PROPAGATION
Before you begin to actually take the lavender cuttings, have the supplies needed at hand and ready to go. Cuttings wait for no one, and the faster you get them into their propagating home, the better.
You will need the following, separated into which propagation method you choose to go with …
- WATER PROPAGATION METHOD – An appropriate sized vase with fresh, clean, untreated water for the number of cuttings you are looking to root. Should your water be chemically treated, think about bottled or distilled water
- SOIL PROPAGATION METHOD – Have your soil prepared and placed into a growing pot (details below)
TOOLS & OPTIONAL SUPPLIES
In addition to the prepared vessel, you will need the following …
- Mature, healthy lavender plant
- Clean garden snips, sharp scissors, or sharp knife
- Clear plastic bag, cloche, or propagator large enough to encompass your pot when using the soil method
- Skewers, or like me, chopsticks to hold the bag away from the cuttings when using that method of creating a greenhouse
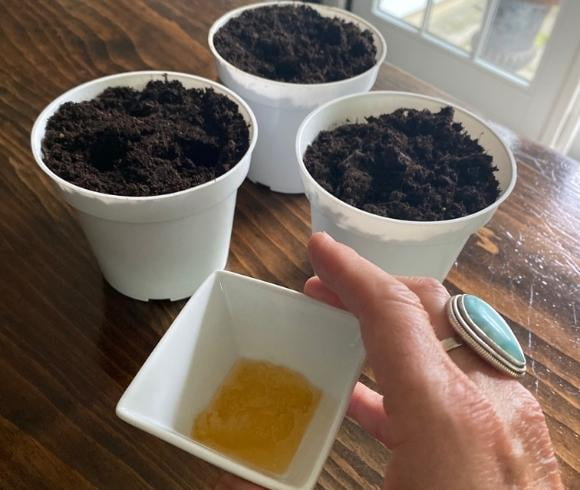
- *Optional (but recommended) – rooting hormone, cinnamon, or raw honey
PROPAGATING LAVENDER IN SOIL
When deciding to go with the soil propagation method, keep away from using plain old garden soil. Instead mix your own or go with a commercial seed starting mix.
PREPARE THE SOIL
To make homemade propagation soil mix half vermiculite or perlite to half peat moss with a little compost, potting soil or bark added in for good drainage.
Fill your chosen pot, making sure it’s clean and sterilized, with the prepared soil. Moisten the soil.
Using the wide end of a chopstick or skewer, or in a pinch your finger, pre-make the holes to place the cuttings.
HUMIDITY REQUIREMENTS
Fresh herb cuttings enjoy a warm and humid environment when propagating. For those lucky enough to live in an environment such as that, you are good to go! Simply place your cuttings pot outside in a shady spot and let them root.
For many of us, however, we need to create such an environment by building a little greenhouse when trying to propagate using soil.
Placing a plastic bag over the pot, using a cloche, or a propagator, and creating a tent or greenhouse over your cuttings should be sufficient. Whichever covering you have, be sure it doesn’t touch the cuttings in any way.
HOW TO TAKE LAVENDER CUTTINGS
No matter which method of propagation you decide upon, one thing remains constant. When taking lavender cuttings, choose from the healthiest of mature, established plants.
Look for stems which are straight, preferably one that has not flowered yet as we want the energy to form roots and not put into creating a flower (or remove the flower), and that looks robust & strong. Its leaves should be free from discoloration, damage, or spots.
BEST TIME TO TAKE LAVENDER CUTTINGS
Mid to late summer is a great time to take healthy cuttings here in garden zone 5a. Those lucky enough to live in a mild climate, lavender cuttings can be available year round!

Plan on taking double the amount of cuttings you will actually need, giving yourself plenty of room for failures. Any overages can always be potted and given as gifts 🤗
When choosing the water propagation method, spring time is the best time to take softwood cuttings from the new emerging growth of the plant.
Hardwood cuttings can be taken anytime during the active growing season, from spring to fall. Be sure to take long, straight stems with no emerging flowers if possible. Should your stems have flowers, snip them off when propagating to redirect the plant’s growth into creating a healthy root system.
HOW TO TAKE LAVENDER CUTTINGS STEP-BY-STEP
STEP 1
From a mature lavender plant, choose a stem that is 3- 4 inches in length or longer, I prefer to err on the longer side of things, choose healthy looking, damage & discoloration free stem.
STEP 2
Using a clean, sharp cutting tool, snip the stem to the desired length just above a leaf node as shown in the image below. This encourages branching of the existing plant.
Trim the end of the stem to just below the next set of leaf nodes.
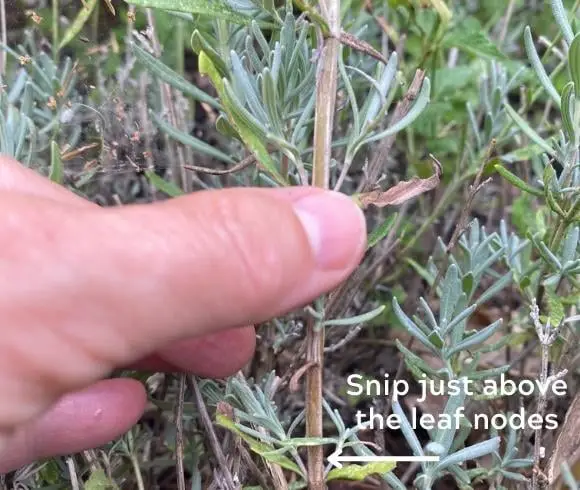
Be sure to have several inches of leaf growth at the top of the stem (allows for photosynthesis) and still be able to remove at least 3 to 5 leaf nodes along the bottom of the stem (enable healthy root growth) when determining the length to cut.
PREPARE THE LAVENDER CUTTINGS FOR PROPAGATION
Prepare the stem by stripping the lower 3 to 5 leaf sets or nodes to promote root growth. Simply snip them off where they connect to the stem using a sharp pair of scissors, or you can easily use just your fingernails.
The removal of these bottom leaves is where new roots will begin to grow along the stem. The more leaves you are able to remove while still leaving several inches of green growth at the top the better.
Remove any flowers or flower buds or spikes that may have begun to develop on the stem to redirect the stem’s energy toward creating roots.
Don’t waste these leaves or flower buds and spikes! Dry them, store them in an air-tight container and put them to good use in making some gourmet dishes and even crafts such as my Flax & Lavender Eye Pillows!
Optionally, when taking cuttings of hardwood, scraping the top “skin” layer from one side of the bottom of the stem may help speed root growth. To do this, using a sharp knife, lightly scrape the bottom of one side of the stem until the green wood within is revealed. This process is not necessary when taking softwood cuttings.
Dip the end of the snipped stem into a rooting hormone, or as I’ve done, into raw honey to promote faster root growth.
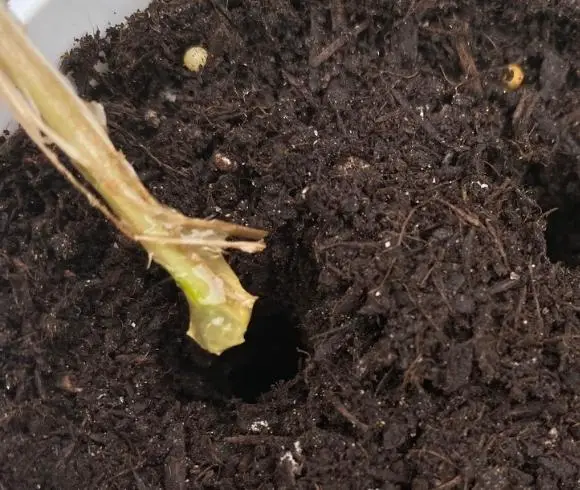
Care should be taken when placing the dipped stem into the hole to keep as much of the honey or rooting hormone where it should be. On the stem.
HOW TO PROPAGATE LAVENDER IN WATER
Although it can be a bit tricky to successfully propagate lavender in water, it can be done.
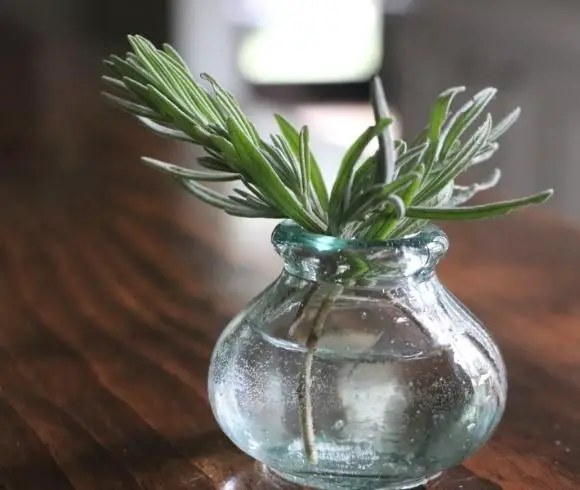
To propagate your lavender cuttings in water …
- Fill an appropriate sized vase or glass with fresh, chemical free water. Should your water be chlorinated, I recommend using distilled water
- Adhere to the recommendations for preparing your lavender cuttings listed above
- Place the lavender stems into the water. Make sure that no foliage whatsoever are touching the water
- Change the water every 2 to 3 days
Roots will appear from where you removed the bottom foliage in about 3 to 6 weeks time or less.
HOW TO PROPAGATE LAVENDER IN SOIL
Take your lavender cuttings and prepare them as described above. Have at hand your prepared soil in a pot of your choosing.
To propagate lavender in soil …
- If you choose to use rooting hormone (I recommend using this only if you are not planning to ingest the lavender you will be growing) or raw honey (this is what I use as I have it from our beekeeping endeavors), or cinnamon, dip the prepared lavender stems into the rooting stimulator. Rooting hormones, cinnamon, or honey encourage fast root development & helps the cut end of the stem from developing rot. That being said, you can be successful in propagating your lavender in soil without any
- Using a pencil, skewer, chopstick, or your finger, create holes in the soil where you will be placing the prepared stems of lavender. This will ensure the majority of rooting hormone or honey remains where it needs to be. On the stem and not lost in the soil
- Place the stem into the hole you made in the soil, taking care to leave as much of the honey or rooting hormone on the stem itself as possible, leaving a bit of room between the top of the soil and the first set of leaves
- Firm the soil gently around the stem
- If you didn’t pre-moisten the soil in the pot, water once planted
- Create a greenhouse by tenting a plastic bag or cloche over the top of the pot, making sure that it does not touch the foliage. If need be, place sticks or skewers into the soil to help lift the plastic away from the plantings
- Place the covered pot(s) in a warm, slightly shaded area. For those in hot climates, you have the option of placing the pot(s) outdoors to propagate and leave in complete shade. Direct hot sun can easily turn your makeshift greenhouse into an oven and cook the tender stems
- Water or mist the soil when the soil feels dry, replace the tenting & return it to its spot
During the rooting period which can take upwards of several weeks to a month or more, let it be.
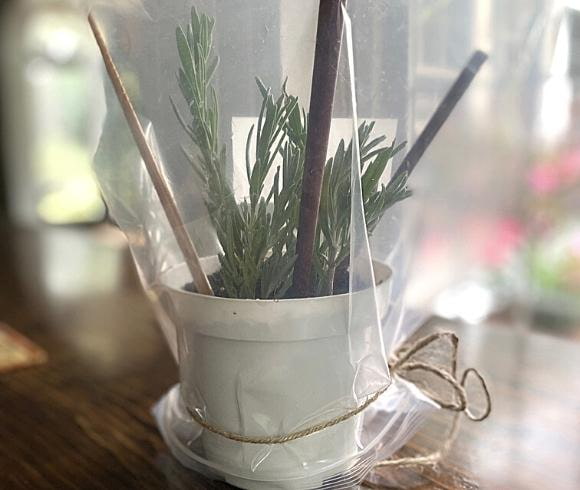
Remove the bag from the potted cuttings after 3 to 4 weeks allowing further ventilation.
WHEN TO TRANSPLANT LAVENDER CUTTINGS
Typically, I will wait until I can see new growth happening above ground when using the soil method, or the roots are several inches in length when using the water method, before I transplant the cuttings individually.
PROPAGATING LAVENDER – TROUBLESHOOTING TIPS
Hopefully, failures will be a rarity. Should they occur, hopefully these troubleshooting tips will answer a few questions which may pop up.
WHY DO MY CUTTINGS KEEP DYING?
Should your cuttings keep dying after repeated efforts, check the following …
- MOISTURE ISSUES – Finding the “just right” balance of moisture & humidity can be a challenge when rooting in soil. Heavy misting or watering can result in wilting & rot issues. Not enough water, allowing the cuttings to become too dry can restrain growth
- WATER – When rooting the cuttings in water, it’s imperative that the water be changed every other day or so. At the minimum, when the water becomes cloudy. Not only for cleanliness & the health of the plant, but also to avoid stagnant water which is depleted of oxygen
- SOIL – When it comes to soil choices, one size potting soil may not fit all uses. Be sure the soil you are using is a multi-purpose compost. The kind with perlite already mixed in. You may want to add a bit of grit such as coconut coir or the like which can be soaked and added to the mix
- LIGHT – Again, finding that just right spot is key when propagating. Bright, indirect light is what we are striving for when it comes to lavender. Too much direct light can kill the cutting completely while too little light can prohibit growth
Learning how to propagate lavender from existing lavender plants is a fun way to expand your lavender garden beds. After all, free plants are a gardener’s delight 😊
Have you enjoyed learning how to propagate lavender?
Love, Light, & Laughter ~

SHOP THIS POST
Enjoy this article? Please consider sharing it on your favorite social media channel! Want more? Subscribe below for the occasional update with all the “happenings on the hill”!
MAYBE OF INTEREST
- How To Sanitize Seed Trays
- How Often To Water Tomato Plants
- Winter Sowing In Milk Jugs
- How To Appliqué
- What Food Group Are Eggs In


9 comments
I just successfully grew lavender from seed this year. Can’t wait to try to propagate what I have!
It is always so much fun to grow flowers! The enjoyment of just watching the changes in the foliage is so rewarding!
Thanks for the tutorial on how to Propagate lavender. Great guide!
We loved learning about how to propagate lavender. It is always good to learn something new.
I love lavender! And you make it look so easy to learn how to propagate lavender. Greatly appreciate the detailed step-by-step instructions.
This is great to know! I’ve never known how to propagate lavender, but I have some in my garden and would love to do this so I can have some inside!
A couple of years ago, we went to a lavender farm for the first time. I fell in love with the products I sampled and purchased, and I wondered if I could grow my own. Maybe I can! Great info here.
My lavender didn’t do so well this year so I’m looking forward to trying again with new information.
Hi Suzan, you have a beautiful blog! I’m so impressed with your bio as well. Love that raw honey can be used in propagating, did not know that.