LAST UPDATED: JULY 11, 2021
Freezing green beans. The great debate, to blanch or not to blanch prior to freezing. That is the question.
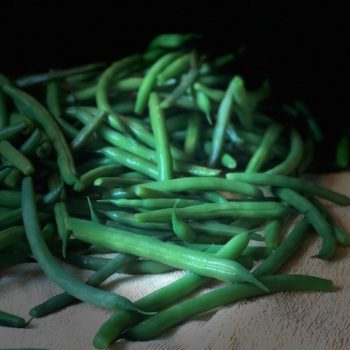
Freezing your green bean harvest is a simple way to enjoy the taste of fresh green beans all year long. When green beans come on, they COME ON! And with a vengeance! I love to preserve and freeze all my (gallons) of green beans for winter eating. Nothing like having that bright green bean that still has remained crisp come December!
Personally, I like to eat my green beans al dente, with a slight bit of a snap to them. I have tried several different methods of freezing and preserving green beans, and below is what I’ve found to have the best results.
I pick almost on a daily basis once they start coming on. Basket fulls. Needless to say, during the height of the growing season we eat those fresh green beans with almost every meal.

PREPARING GREEN BEANS FOR STORAGE
Until you have enough of a harvest to make it worth your while to preserve them, I recommend to harvest, place unwashed beans in a clean storage bag or baggie of your choice, and store in the crisper of your refrigerator. Green beans stored in this manner will keep up to 7 days. Anyone who grows their own knows it only takes a couple days of harvesting to get a good haul.
It is a pretty simple process to prepare your green beans for storage, no matter your method of choice. Regardless, I recommend you go through your green bean yield and remove any debris from the beans and give a quick rinse.
Whether or not you dry your beans after a washing really depends on the method you are choosing to freeze them for long-term storage. If you are staying true to the blanch method for preserving, drying is not necessary. If you are taking a stance & being a bit of a rebel and choosing to flash freeze directly without blanching, I would recommend drying them first.
If you didn’t pick your beans by snapping the top stem off (the end that the green bean is attached to the plant) do this now. Some will also snap off the tail end (the pointy end) of the bean off as well. Personally, I leave it on. It’s edible, waste not want not, and it makes for a pretty green bean on the plate.
In the past, I typically always blanched my green bean harvest. However, I’m always looking to simplify things here on the hill and re-thinking this process. This year I will freeze my harvest using both methods, blanching and not blanching to compare. If there really is not difference in taste, color, or texture? You can bet I will be skipping the entire process of blanching.
There are many thoughts on this, to blanch or not to blanch. It’s believed that blanching stops the enzyme actions which can cause loss of flavor, color, and texture. Blanching cleanses the surface of any remaining dirt and organisms, helps stop the loss of vitamins within the beans and allows them to maintain their brilliant green color.
I will be sure to post the results once completed 😊
PRESERVING GREEN BEAN OPTIONS
To preserve your green bean harvest, you have options. Personally, I like options. For long-term storage you can freeze using your option of two different methods, which we will be going over in this post. You can also preserve by canning using the pressure canning method (keep an eye out for a future post on pressure canning), you can ferment (be sure to take a look at my lacto fermented dilly bean recipe!), and you can even dehydrate.
SHARING IS CARING!
Now full disclosure here, I’ve never dehydrated mine, but my friend over at Schneider Peeps has a tutorial on how to dehydrate green beans should you be interested.
BLANCHING GREEN BEANS FOR FREEZING
No matter which option you choose to prepare your green beans for freezing, you want only the best of the best. Choose beans that are on the younger side. These will be tender and not as tough as older ones.
Have older beans? Cook the heck out of them and eat fresh.
You will need two large stockpots. One to boil the beans and one to “shock” them.
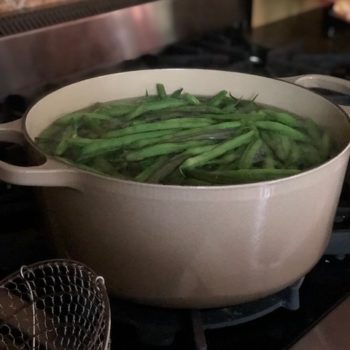
To blanch, simply bring a large pot of water to boil on high heat. Put as many prepared green beans as will fit with room to still move around as possible (I apologize for the pic quality! What was I thinking?). Boil the beans for 2-3 minutes, until they turn bright green in color.
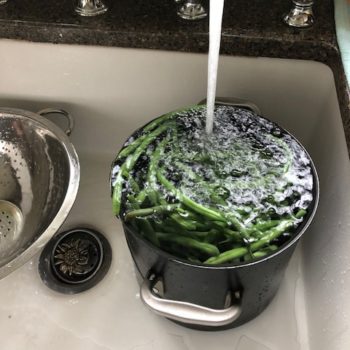
Remove the beans from the stockpot and immediately place in the second stockpot filled with cold water and a few ice cubes. This “shocks” or stops the cooking process.
I usually leave these for about a minute or until you swish them around and they do not feel warm to the touch in the water. You may have to add more cold water at times if you don’t change the water after each blanch such as I did.
Once your shocked beans are cool, drain them in a strainer and let them set as you work on blanching another batch.
My rather “high tech” method for drying consist of a couple of clean beach towels. Lay one out on your countertop. After your beans have drained well, lay the shocked beans in a single layer on a towel to completely dry. I cover these with another towel and leave them to dry completely for the day. This aids when you begin to use the FoodSaver, if you choose, or freezer baggies.
Optionally, you can also freeze your green beans with a bit of the blanching liquid by using freezer containers. I will say, however, this is my least favorite way to freeze and store mine. Why? It just takes a bit longer when cooking as they come from the freezer in a block of ice.
FREEZING GREEN BEANS USING FOODSAVER
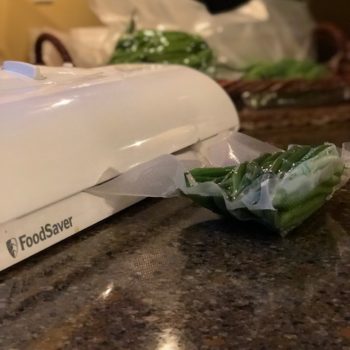
I prefer to use my FoodSaver for freezing my green beans as I can be sure that all the air has been removed from the portions, reducing the risk of freezer burn on the beans.
I freeze in individual meal portion sizes for our family of 3. Nothing scientific here, just a big guess or judgment for your family’s requirements per meal. I like to use the quart size FoodSaver bags as I can adjust up or down the quantity I want to have for each package.
Mark your bags with date and year as well as any other pertinent information you like. Place the number of beans at the bottom of each bag that you desire. I like to adjust the beans so they are all going in the “same direction” if you will, lining up with the bottom of the bag. Sealing the FoodSaver bag is so quick and easy! Additionally, I like to total the number of bags I’ve sealed & add the totals and pertinent information in my Freezer Inventory page. See below for where you can find yours!
Once you have the right amount of beans, line up the open edge of the bag in the FoodSaver, push the cover down until you hear the machine turn on, hold for 3-5 seconds and let run until machine stops.
Place the sealed bags & labeled bags in your freezer for storage.
For best flavor and nutrients plan to use your sealed green beans within one year.
FREEZING GREEN BEANS WITHOUT BLANCHING
Now this simple method for freezing green beans without blanching is one that I’m excited to try. It’s quick, simple to do, and hopefully will not make a bit of difference in the texture & quality of the beans.
To freeze green beans without blanching, again, select only the best. Prepare as stated above, and optionally you can cut or snap the beans into smaller bite size pieces if you like.
Rinse the prepared beans and lay out on a clean towel to dry. And dry well. Freezing damp or wet string beans will increase the probability of the development of freezer burn.
Once completely dried, you have a couple of options for freezing. If you are utilizing the FoodSaver, follow the directions above, label, and freeze.
Should you be using freezer bags, I recommend flash freezing the prepared beans by laying them on a cookie sheet, place them in the freezer for about an hour, remove them, place in your freezer bags, label and store in the freezer.
Again, for best results, plan on using your frozen green beans within a year’s time. Frozen green beans are wonderful additions to any dish. Casseroles, shepherds pie anyone?, soups, stews, and as a side dish for most meals are all on the table here on the hill.
I do recommend boiling until tender when used as a side dish, or my preferred way, steaming them. After all, I want to be the receiving end of green bean nutrient value(s) and not a pan of water 😊
KITCHEN INVENTORY & MEAL PLANNER
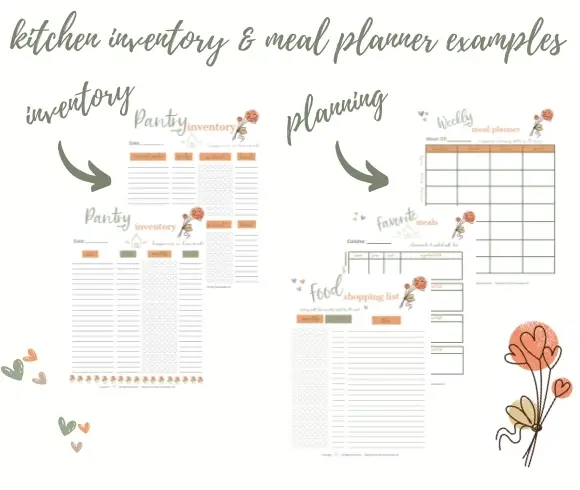
When you preserve, freeze, & dehydrate as much as we do, it can be a challenge to keep track of it all! My Kitchen Inventory & Meal Planner Bundle will help you do just that!
I created this whimsical, printable bundle to help me keep track of it all. There is no question now of what may be hiding in my freezer, and that’s a good thing for sure 😊
It’s affordable, cute, and works.
Freezing green beans, to blanch or not to blanch. Which method of freezing your green bean harvest will you be using?
Love, Light, & Laughter ~



3 comments
My bean plants are looking great. Can’t wait to see what the harvest will be.
I’ve never used a FoodSaver, but it looks like a super idea!
Thanks for sharing at the Homestead Blog Hop! Pinned and posted.
Great information! Thanks for linking up at the #GatheringofFriendsLinkParty 5